

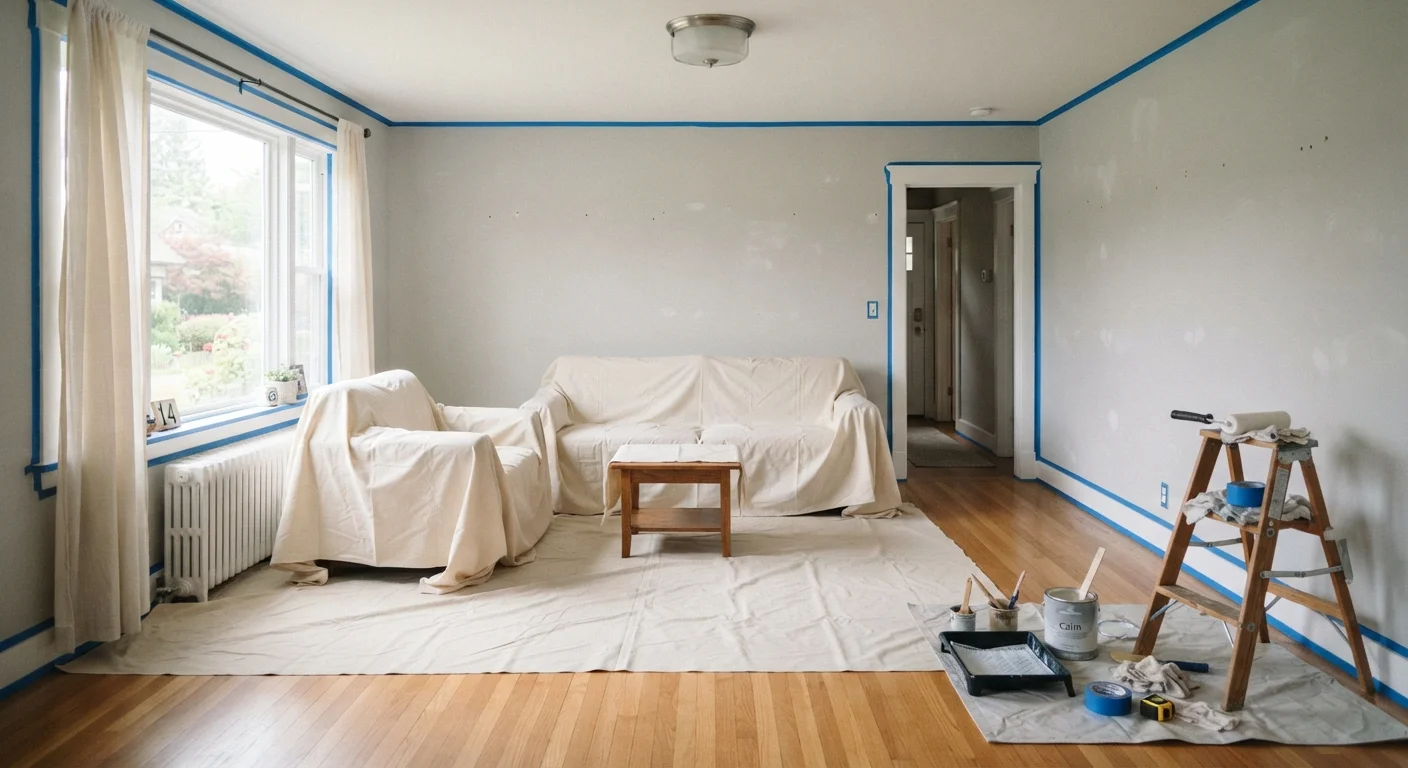
Why Prep Work Determines the Final Result
Most paint failures - streaks, peeling edges, bleed-through, and uneven coverage - trace back not to the paint itself, but to what happened before the first coat was applied. Preparation is the unglamorous half of every successful paint job, and skipping it rarely saves time in the long run.
Whether you're freshening up a living room or repainting a rental before moving out, the steps that happen before you crack open the can matter far more than the brush technique or the paint brand. For a broader look at how common renovation shortcuts backfire, see our home improvement myths guide.
Clean all wall surfaces thoroughly before applying any paint or primer.
Paint adheres to the surface beneath it. Grease, dust, and residue create a barrier that prevents proper bonding, leading to peeling or flaking within months. This is especially important in kitchens and near entryways where oils accumulate.
Use painter's tape with deliberate pressure along every edge and trim line.
Loosely applied tape allows paint to wick underneath, creating ragged lines that require touch-ups or full repainting. Taking an extra minute to burnish the edge pays off in a clean, professional result.
Patch all holes and surface damage before priming, and sand smooth once dry.
Unprepared imperfections become far more visible under fresh paint because the new color draws attention to every texture inconsistency. Addressing them before painting avoids the disappointment of seeing flaws amplified by a new finish.
Apply primer to patched spots, bare drywall, and any stained areas before painting.
Without primer, raw or repaired areas absorb paint unevenly, creating dull spots or visible patches in the final color. Stains from water damage or markers can bleed through multiple coats of paint if not sealed with an appropriate stain-blocking primer first.
Lay canvas drop cloths on the floor and over covered furniture before opening any paint.
Paint splatters happen even with careful technique, especially when cutting in near ceilings or rolling. Canvas cloths stay in place and absorb drips rather than spreading them underfoot like plastic sheeting can.
The Prep Checklist: Room Setup and Surface Work
Getting a room ready for paint involves two phases: protecting what you don't want painted, and fixing the surfaces you do. Moving through both systematically prevents rushed mistakes.
Canvas Over Plastic for Floor Protection
Plastic drop cloths are slippery underfoot and tend to bunch up as you move around, which can create a tripping hazard. Canvas drop cloths lie flat, absorb paint drips rather than spreading them, and can be reused for years. If you're protecting finished hardwood or tile, lay the canvas first, then add a layer of rosin paper for extra protection against heavy drips.
Start by removing as much furniture as possible. Anything left behind should be moved to the center of the room and covered with drop cloths or old sheets. Use canvas drop cloths on the floor - they stay in place better than plastic sheeting, which shifts underfoot and can cause slips. If you're also tackling a full room refresh, our room-by-room decluttering guide can help you clear the space first.
Before any tape goes up, clean your walls. A mild solution of dish soap and warm water removes dust, oils, and cooking residue. Pay extra attention to areas near light switches, baseboards, and door frames - these collect far more grime than most people expect. The hidden spots guide covers exactly which surfaces to prioritize. Let walls dry fully - at least an hour - before moving forward.
Taping, Patching, and Priming: The Details That Show
Once your room is clear and surfaces are clean, the three steps that most directly affect the finished appearance are taping, patching, and priming.
Taping: Apply painter's tape - not masking tape - along all trim, baseboards, window frames, and ceiling edges. Press the tape edge firmly with a putty knife or your fingernail to seal it; paint seeping under loosely applied tape is one of the most common causes of messy lines. Remove tape while the final coat is still slightly wet for the cleanest pull.
Patching: Fill nail holes, small cracks, and dents with lightweight spackle or joint compound. Once dry and sanded smooth, these spots will be nearly invisible. Use a bright work light held at a low angle to rake across the wall - this side-lighting reveals bumps and depressions that flat overhead lighting misses entirely.
Priming: Primer is not optional when painting over dark colors, raw drywall, patched areas, or stained surfaces. Skipping it on these surfaces often means needing three or four coats of paint to achieve even coverage. A single coat of appropriate primer saves both time and paint. For a full pre-project walkthrough, our pre-renovation checklist is worth reviewing before any room project begins.
Older Homes and Lead Paint Considerations
Homes built before 1978 may have layers of lead-based paint on walls, trim, and windows. Sanding or scraping these surfaces can release hazardous dust. If you're working in an older home and are unsure whether lead paint is present, consider using an inexpensive lead test kit available at hardware stores before sanding. For significant lead paint concerns, consult a certified renovator - this is not a task to approach without proper precautions.
The content on this site is for informational purposes only and is not a substitute for professional advice. Always consult a qualified professional for guidance specific to your situation.