

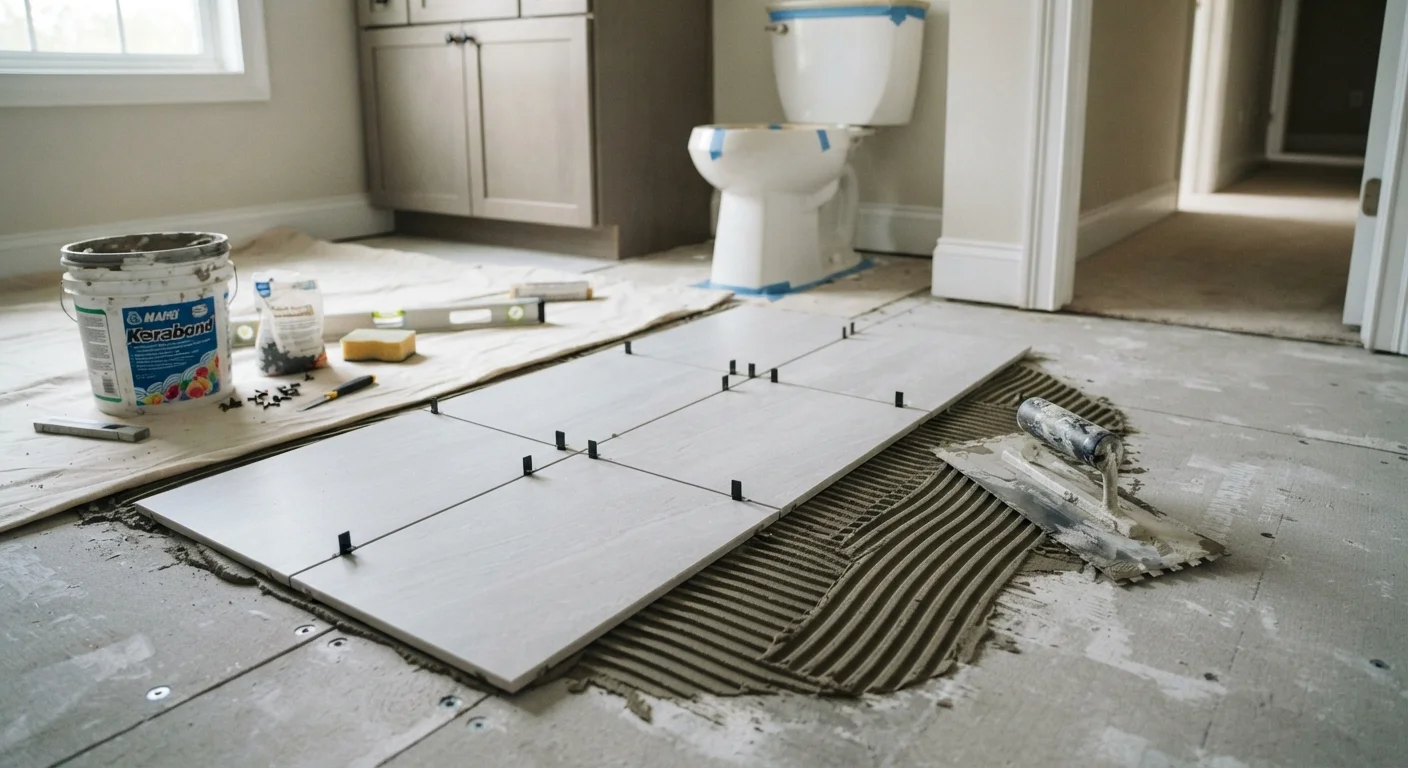
Why the Substrate Matters Most
Every tile failure - cracked grout, popped tiles, moisture damage - almost always traces back to the surface underneath, not the tile itself. The substrate is the foundation your tile relies on completely.
For floors, the substrate must be stiff enough that it does not flex under load. A general rule of thumb is that deflection (the slight bending of a floor when weight is applied) should be no more than L/360, where L is the span length in inches. Exceeding this threshold causes grout to crack over time. If your subfloor feels springy, adding a layer of cement backer board (such as cement board or fiber-cement board) significantly reduces flex.
For wet areas like showers and bathroom floors, standard drywall is never acceptable as a tile substrate. Use cement backer board or a foam-core tile backer panel, both of which resist moisture without deteriorating. In shower enclosures, a waterproofing membrane applied over the backer board adds an essential second line of defense.
Prep the Substrate - No Shortcuts
Grinding down high spots, filling low spots with floor-leveling compound, and firmly securing any loose subfloor panels are non-negotiable steps. Industry professionals estimate the majority of tile failures stem from inadequate substrate preparation rather than faulty materials or technique. If your substrate isn't flat, stable, and dry, no amount of skill in laying tile will overcome it.
Before you buy tile, assess your substrate honestly. Grinding down high spots, filling low spots with floor-leveling compound, and securing any loose subfloor panels are non-negotiable prep steps. Skipping this work is the leading cause of premature tile failure.
If you're comparing tile against other flooring materials for your space, our flooring comparison guide covers the trade-offs in detail.
Planning Your Layout Before You Mix Anything
Layout planning is where professional results diverge from amateur ones. A few minutes of dry-laying tiles before any mortar is mixed can save hours of correction work.
Start by finding the center of the room. Snap chalk lines from the midpoints of opposite walls to establish two perpendicular reference lines. Use a framing square or the 3-4-5 triangle method to confirm the lines are truly square - if they're off even slightly, your grout lines will visually drift toward walls.
Dry-lay a row of tiles from the center outward toward each wall, inserting tile spacers to simulate grout joints. This reveals how the edge cuts will land. Ideally, avoid ending with a sliver of tile (less than half a tile's width) at any visible wall - it looks unfinished and is harder to cut cleanly. Shift your center point slightly if needed to produce balanced cuts on both sides.
Always check your reference lines for square using the 3-4-5 triangle method: measure 3 feet along one line, 4 feet along the other, and confirm the diagonal between those two points measures exactly 5 feet.
Even a small deviation from square compounds across a room, causing grout lines to visibly skew toward walls - a mistake that is impossible to correct once mortar is set.
After pressing each tile into thinset, lift one tile every 20 minutes and inspect the back. You should see full, even thinset coverage with no dry spots. If you see bare areas, increase trowel angle or switch to a larger notch size.
Full mortar coverage - ideally 95% or more on wet-area floors - is required by industry standards (ANSI A108) and directly determines how well tile bonds and resists cracking under load.
Mark your reference lines on the substrate with a pencil or chalk so they remain visible after thinset is applied. Work in manageable sections - typically no more than 10-15 square feet at a time - so the mortar doesn't skin over before tiles are set.
Mixing and Applying Thinset Mortar
Thinset mortar is the adhesive layer bonded to the substrate. The consistency matters: it should hold a peak when you pull the trowel away - similar to peanut butter - without being runny or crumbly. Follow the manufacturer's mixing ratio precisely, and let the mixed thinset slake (rest undisturbed) for 5-10 minutes before a final stir. This activates the polymer additives.
Apply thinset to the substrate using a notched trowel. The notch size is determined by your tile size: smaller tiles use a ¼-inch V-notch, while larger-format tiles (12×24 inches and above) typically require a ½-inch square-notch trowel. Hold the trowel at a consistent 45-degree angle to create uniform ridges.
For tiles larger than 15 inches on any side, also back-butter the tile itself - apply a thin skim coat of thinset to the back of the tile before pressing it into the substrate bed. This eliminates voids, which can crack tiles over time, especially on floors.
Test Coverage Before Committing
After setting three or four tiles, lift one immediately and inspect the back. You should see thinset covering at least 80% of the surface (95% in wet areas). Bare spots mean your trowel angle is too shallow or you need a larger notch size. Adjust now - not after the whole floor is down.
Setting Tile and Maintaining Even Spacing
Press each tile firmly into the thinset with a slight twisting motion, then check it with a level or straightedge against adjacent tiles. Lippage - the height difference between neighboring tile edges - should be minimal, ideally less than 1/32 inch for wall tiles and 1/16 inch for floor tiles in most residential applications.
Insert plastic tile spacers at each corner junction to maintain consistent grout joint width. Common joint widths range from 1/16 inch for a tight, contemporary look to 3/8 inch for rustic or handmade tiles that vary slightly in size. Uniform joints make grouting far cleaner and easier.
Use a rubber mallet and a beating block (a flat scrap of wood) to gently tap tiles level. Never strike a tile directly with any hard tool. Remove spacers before the thinset fully cures - typically within 30 minutes of placement. Allow the thinset to cure fully, usually 24-48 hours, before walking on the surface or applying grout.
95%
Minimum thinset coverage for wet-area floor tile
The ANSI A108 tile installation standard specifies at least 95% mortar coverage for tile in wet or exterior applications.
L/360
Maximum floor deflection for tile substrates
The Tile Council of North America (TCNA) specifies this deflection limit to prevent grout cracking over time.
24-48 hrs
Typical thinset cure time before grouting
Most polymer-modified thinset mortars require a full 24-48 hours of cure time before the installation can bear foot traffic or grouting.
Grouting, Sealing, and Final Finishing
Once thinset has cured, mix your grout to a smooth, lump-free consistency. For joints narrower than 1/8 inch, use unsanded grout; for wider joints, use sanded grout, which contains fine aggregate to prevent shrinkage cracking. Epoxy grout is a durable third option for high-moisture or high-traffic areas, though it requires faster working time and more careful application.
Apply grout diagonally across the tile surface using a rubber grout float, pressing it firmly into joints. Work in sections of roughly 5-8 square feet. After about 15-20 minutes - when a light haze begins to form - wipe the surface with a damp (not wet) sponge in a circular motion, rinsing the sponge frequently. Avoid using excess water, which weakens grout.
At all inside corners, changes of plane (floor to wall), and transitions to fixtures, remove any grout and fill with a flexible, color-matched caulk instead. These joints must flex with structural movement; rigid grout will crack. For a deep dive on choosing between these two materials, see our grout vs. caulk guide.
After grout has cured fully (check the product label - usually 48-72 hours), apply a penetrating grout sealer to cement-based grout using a small brush or applicator bottle. Sealer reduces staining and moisture absorption without altering appearance. Reapply annually in high-traffic or wet areas.
This article provides general home improvement information. For projects involving structural modifications, load-bearing surfaces, or waterproofing in wet areas, consult a licensed tile installer or contractor to ensure work meets local building codes.
The content on this site is for informational purposes only and is not a substitute for professional advice. Always consult a qualified professional for guidance specific to your situation.